Difference Between Spar Urethane And Polyurethane

Difference Between Spar Urethane And Polyurethane

Difference Between Spar Urethane And Polyurethane

Although polyurethane and spar urethane are similar in some ways, they also differ in other ways.

So, what are the differences between spa urethane and polyurethane?
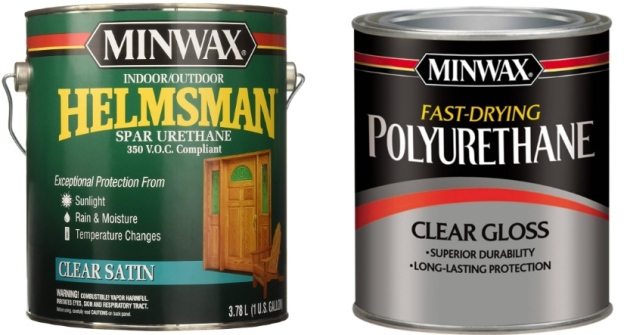
Spar Urethane

Spar urethane is a protective finish that is used for interior and exterior woods that may be exposed to different weather conditions. It protects wood from fading by blocking UV rays.
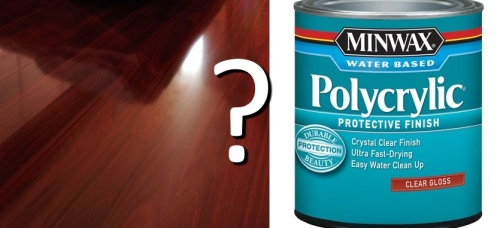
Polyurethane

Polyurethane is a finish that comes in both oil and water form. Water polyurethane cannot withstand high temperatures or heat.

Polyurethane is used to get a smooth and blemish-free texture on woods.


The following information will help you to better understand the difference between polyurethane and spar urethane:

Application

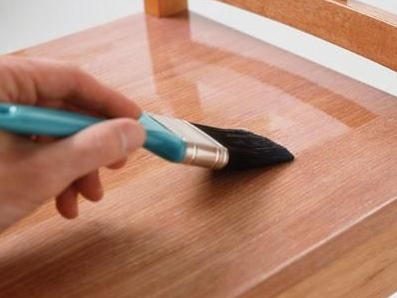
Polyurethane will require someone with advanced skills, as the wrong application may cause brush strokes or bubbles.

Polyurethane will also dry slowly; this will make the application process longer.

Spar urethane, on the other hand, is much easier to apply than polyurethane. Spar urethane will also dry faster as it doesn’t require many layers to get a shiny finish.


Features

Difference Between Spar Urethane And Polyurethane - 2

The main difference between spar urethane and polyurethane is the amount of oil mixed with each of them.

Polyurethane is mixed with less oil and it is more hard and stiff. Spar urethane is mixed with more oil and is softer than polyurethane.


Pros of Each

Polyurethane is much more resistant to harsh conditions, and it will last longer and produce a quality finish.

Spar urethane generally has low levels of toxins and does not produce any odor or fumes.

Cons of Each

The main disadvantage of using polyurethane is that it emits an odor and strong fumes during application. These strong fumes may cause headache and dizziness for those who are exposed to it for lengthy periods.

When it comes to spar urethane, the well-known disadvantage is that it does not mix well with oil-based substances like paints. This results in color imbalance during application.


Conclusion

Both polyurethane and spar urethane are useful compounds that can be used to add a touch of protection (and quality) to furniture.

When choosing between the two, you have to consider the materials that you will apply the finish to, the conditions these materials will be subjected to, and your goals.

I hope this article helps. If you want to read about choosing a table saw that can cut your wood pieces to perfection, go hereGood luck!

Why You Should Never Put Polycrylic Over A Red Mahogany Stain

Why You Should Never Put Polycrylic Over A Red Mahogany Stain

You want to be sure that wood is treated with the utmost care to give it that classy look.

To ensure the longevity, durability, and great shine of your wood, you will want to cover it with a finishing liquid to make sure that it serves you well for the long term.

Polycrylic Over Red Mahogany Stain?

However, frequent debate has gone on about whether or not you can use a polycrylic protective coat over red mahogany stain. For your convenience, we’ve set out a little explanation of just why this should be avoided.


What Is Polycrylic?

Polycrylic is a water-based protective coat that has a little bit of polyurethane mixed in. It protects and gleans interior wood surfaces such as furniture, doors, cabinets, and woodwork, which itself may be professionally cut or straightened from warp (more details here).

This protective coat increases the durability of wood by helping it to withstand harsh weather conditions and everyday wear.

It also offers a faster drying time than an oil-based alternative and can be used on wood already covered with water-based stains or on bare wood.

Polycrylic can be easily cleaned with warm water, and is best to use over light woods such as maple, ash, and birch.


Staining Your Wood

Staining involves finishing with a penetrating wood stain that usually changes the color of the wood. It can be used to make wood look like it is actually more expensive that it really is.

Wood stain is usually an oil-based liquid that is wiped across the wood’s surface and left to dry. Before it dries completely, excess stain should be wiped off. The end result is wood that has a nice glossy finish.


Combining Polycrylic and Red Mahogany Stain

A red mahogany stain is simply a wood stain oil that colors your wood to make it look like it is made from red mahogany. The problem arises when one puts polycrylic over red mahogany stain.

One reason why this should be avoided is because the bases of the two products differ.

The red mahogany stain is an oil-based finish, while polycrylic is water-based. When these two bases are combined, the water-based finish will cause the color to turn a browner color than the intended red.


Conclusion

Oil and water are not miscible products, and this includes finishes with different bases. When you try to smear polycrylic over red mahogany stain, the polycrylic might move the pigment in the stain, meaning one has to watch carefully how it’s applied.

It might also take several days to lose the stickiness of the finish. Overall, it is recommended to not try your luck with adding polycrylic over a red mahogany stain.

Tips For Choosing A Great Table Saw

Tips For Choosing A Great Table Saw

The table saw is arguably the single most important item you are likely to purchase for your shop. The quality and size of your projects will be dependent on the accuracy and capacity of your saw.

Tips For Choosing A Great Table Saw

Price should not be the only determining factor, but in case you cannot afford the saw that you really want, wait until you can afford it.

Consider what your needs are and then determine which machine will best match those needs. Rushing into purchasing a table saw without first doing research (reviews, etc.) will almost certainly lead you to purchase a machine that will not fit all of your needs.


Factors To Consider

There are many features to think about before you make your final decision. A few of these features are blade size, arbor size, motor horsepower, ease of operation, the tilt of the blade, fence operation, rip fence, and safety features.

We’ll discuss a few of these features in this article, but we won’t be able to cover everything.

Arbor Size

The precision and smoothness of all your cuts will certainly be determined by the strength and alignment of your arbor. The arbor is part of the trunnion and that is what you use to create 45° cuts.

Be cautious to always tilt away from the safety fence so the workpiece does not get pinched between the blade and fence and cause a kickback. Always remember when operating a table saw to keep safety in mind.

Kickbacks

It should be standard practice to stand to the side as you cut and not directly at the rear of the workpiece in order to avoid injury.

There are many kickback devices on the market that will help you avoid accidents. Remember that some kickback devices can be just as dangerous as a kickback itself. Some devices are made of metal which could get caught in the blade and fling wood and metal directly in your face.

Simply be careful when you choose the type of kickback device you are going to use. Always employ a push stick or similar device when cutting to avoid losing your fingers.

Motor Horsepower

Horsepower and blade size go hand-in-hand.

Larger blades will need more horsepower to make those deep cuts or rips required to slice through larger pieces. Insufficient horsepower can cause the blade to bind and even get stuck in the heart of your cut, which is never a good or safe situation.


Like I stated previously, these are only some of the things to consider before you decide to purchase a table saw.

Considering all factors is a great way to gather all of the information you need to make a smart purchase. Make sure you purchase the correct size saw you will need to complete all your future projects.

To see some very detailed guides for choosing a table saw along with reviews of some of the best models, visit Carve Your Creation.


Did you find this article helpful? Feel free to share or leave a comment!

Learn How To Lighten Stain In Wood

Learn How To Lighten Stain In Wood

Finding the color of your wood furniture too dark? Lightening the color can be more difficult than you think.

How To Lighten Stain Image 1

Stains are made partly transparent in order to keep the wood’s natural grain visible. Covering a dark stain with a lighter one won’t work; in fact, it may darken the wood.

In this article we’ll talk about some ways for how to lighten stain in wood.


Method 1 – Strip and Replace

One option is to totally strip and replace the existing stain.

Apply a varnish remover to the wood and rub it in with steel wool or a wire brush.

Once you’ve removed the existing stain, the dark color will likely be gone. If not, you can sand down the wood to remove the rest of the color.

Now you can reapply the lighter stain that you prefer. This is the simplest and most effective method, but it can be time consuming.


Method 2 – Pigmented Overlap

If the above method is too aggressive, you could try applying a pigmented stain (1) over your existing stain.

Pigmented stains are less transparent. They contain some opaque coloring, like a thin paint. This helps to block out the darker stain, leaving only the newly-applied lighter color.

This will, however, obscure your wood’s grain, so be sure you’re okay with that before going down this path.

This method is effective if you want only a small change in shade.


Method 3 – Bleaching

How To Lighten Stain Image 2

Finally, you can try lightening the shade of the stain by applying bleach.

This is the most difficult method; if the bleach is applied (2) unevenly, it will lead to spotty results, which will look terrible. Too much bleach could strip areas of stain entirely or even damage the wood underneath.

For lightening an existing stain, use chlorine bleach. Using a small brush, first apply a test amount to a less visible part of the wood. When you are happy with the results, apply the same consistency to the entire surface.

Keep reapplying to keep the surface wet while the bleach is working. Then scrub off the remaining bleach, and wash the wood thoroughly. The color of your stain should be lightened to your liking.


Remember to go slowly and use appropriate safety gear such as gloves and goggles. Bleach can easily burn skin, as well as damage your wood.

If you want an exquisite, precise cut for your wood in addition to a lighter stain, you can look into this great CNC router option that’s really cheap.

Best of luck with your stain lightening project!

I hope you found this instruction helpful. Feel free to leave a comment below!

Build Wooden Organizer Boxes The Easy And Cheap Way

Build Wooden Organizer Boxes The Easy And Cheap Way

So you’re hoping to decorate your home with wooden organizers, are you? You don’t really need to spend a great deal of money on supplies for them.


What You’re Going To Need

You will need several items for a homemade wooden organizer.

First will be a wooden bottle box (1). You’ve probably seen these before; they range in size and have been used in the past by delivery companies. The best locations to find these boxes are flea markets, antique stores, garage sales and places that sell second hand items.

Build Wooden Organizer Boxes Image 1
(not the finished product) Wooden bottle boxes are needed.

The uses for these kinds of wooden box organizers are in the thousands. For example, you can place them on the wall in your bathroom for your medication bottles, washcloths, or your collectibles such as thimbles and small glass figurines. If you are lucky enough to find a large box, you can use it for kitchen towels or bathroom towels, kitchen cups or a spice rack and even a CD or DVD holder.

In order to make your wood box look attractive, you’ll need a can of spray paint, or a pint of each color of latex paint that you wish to paint the box with.


The Process

Paint it one solid color and place stickers on the sides and in each square. Place wallpaper around the outside edge to match the room the box will be used in. If wallpaper will be used, do not forget the paste to stick it onto the box.

After painting the wooden organizer (for a potentially great wood option, read up on the definition of whitewood), it will need a coat or two of clear protective acrylic finish to keep it shiny and clear of dust and dirt. By placing a clear finish on the box, you will be able to dust it without using chemicals.

The ideas are limitless for this form of wooden organizer. If the wooden organizer is for larger items, then you can shop for a larger box or one with larger squares within the center. Screws will be necessary for hanging the box in the chosen room.

On the other hand, eye rings screwed to the corners of your box will make it possible to hang your organizer from wires as a free-hanging fixture. Hanging, however, is not recommended if you are placing breakable items in your organizer box.


The Cost

Build Wooden Organizer Boxes Image 2

The cost of building an organizer of this style will vary; the wooden bottle box will normally range from $5.00 – $25.00, a pint of paint $7.95 – $10.00, and clear acrylic $6.95 to $11.95.

Wallpaper can be purchased (2) as border strips depending on the size of the wooden organizer, and they’ll typically run from about $3.95 – $9.99. Screws and eye bolts range from $0.25 – $1.00.


Overall, you can have a relatively inexpensive wooden organizer with a little bit of work and enjoy some family fun along the way.

I hope you found this instruction helpful. Feel free to leave a comment below!

Can You Use A Minwax Stain Outdoors?

Can You Use A Minwax Stain Outdoors?

A Minwax stain is a penetrating oil-based stain that comes in different colors depending on the preference of the user. It enhances the beauty of wood, and it is normally used for staining indoor woods such as cabinets, wooden floors, and doors.

Can I Use a Minwax Stain Outdoors Image 1

There are two types of Minwax stains: oil-based and water-based. Water-based Minwax stains are easy to clean, dry faster and produce less odor as compared to their oil-based counterparts.

Bad Weather

Bad weather such as rain, thunderstorms, and snow may affect a Minwax stain.

The elements can cause the stain to fade and therefore lose its initial beauty. Rainwater can also wash out the Minwax stain, especially if it’s water soluble.

Bad weather causes Minwax stains to wear quickly, and hence it loses its capability of protecting the wood. The wood becomes vulnerable to insects, and it is further damaged by continued bad weather.

Moisture may have serious effects on the furniture such as:

  • Poor color changes
  • Faster furniture aging
  • Growth of fungi on the furniture
  • General loss of wood strength

Effects of Ultraviolet Rays

Harsh ultraviolet rays from the sun are known to destroy the Minwax stain on furniture. They bring about fading in the furniture, and the sun’s harsh rays can burn the Minwax stain and fade it off quickly.

Can I Use a Minwax Stain Outdoors Image 2

Lack of UV ray inhibitors in many Minwax stains make the wood more prone to damage from UV rays. Exposure to UV rays destroys the wood’s lignin (a strengthening compound present in most woods) material, therefore weakening the wood.

A combination of moisture and UV rays can make the wood shrink and even warp, causing it to lose its natural structure. This warping will carry over to any furniture made with the wood, making it flawed and potentially unusable.

Best Stains to Use Outdoors

To prevent these adverse effects, many people recommend the following wood finish stains:

  1. Urethane
  2. Epoxy

Can I use a Minwax stain outdoors?

I don’t recommended using Minwax stains outdoors, due to the reasons discussed above.

However, if you have to use it for one reason or another, then you should mix the Minwax stain with special oils such as the Minwax Tung Oil finish. The oil helps to protect the Minwax stain from the harmful effects of bad weather and ultraviolet rays. Take this precaution and you might just be okay.